Thursday, February 12, 2009

No Black Horse, Yet there are Cherry Trees


Original.


New one.

I picked out a simple background of cherry trees from the Internet and I cut the characters from the original Naruto picture and put them one here. (The black-haired one is named Shikamaru, the other is named Gaara.) I like how it came out, mainly because it really does work out. (I was going to add more, but I figured cluttering it up wouldn't make it feel quite right, ja?)

Wednesday, February 11, 2009


The process for creating animated gifs in Gimp is fairly straight forward. Basically you can animate any multi layered project. In this case I simply created 10 layers/copies of the Homer image and changed the color of each slightly. Once that was done I selected filter>animation>optimize for gif. When you save the file you need to make sure to save it as a .gif. When the file is exporting you need to make sure to save it as an animation and that it animates as one frame per layer.

The trickier part was figuring out how to get the animated gif to show up on Blogger. It was pretty straight forward once I figured it out:
1. Upload to www.tinypic.com
2. Click on "Share on MySpace"
3. use the blog forum procedure and copy the thumbnail direct link.
4. In blogger use the add image procedure, but rather than uploading an image copy the tinyurl

Pretty easy, just takes a few steps. I'll show everyone how to do this tomorrow and maybe we'll play with some simple flipbook-stop action type animation.

Using the Curves Tool to Make Colors Stand Out

I played with the Curves tool on this photo of my dog waiting for a tennis ball. It is one of the more useful tools for basic photo editing. Curves works for changing the color, brightness, contrast or transparency of the active layer or a selection. To use it go to Tools>color tools>curves (or right click on the picture and follow the same path). Not sure how well you can pick up the difference between the two photos on the blog, but basically what I did was create an "s" curve and made the picture pop a little bit. The blue a little bluer, green a little greener, black a little blacker etc.


On this girl I removed her freckles using the band aid tool. I selected part of her chin to cover her freckles. I also played around and Removed her necklace and the wrinkle in her neck using the same technique. Then I tried removing the letters from her shirt using the same tool but I found that the product was better after I used the dropper tool to match her shirt then painted over the letters then used the band aid tool to cover it up.

Cat


This is a picture of my cat, Femi, I used the select tool to select the eyes then used colorize to change to color.

Beach


When making this is started with a completly empty beach scene. I copied off a seagull and placed it in the foreground. I then found a picture of a couple walking along the beach in the sand i copied them off of the pictuer and added them. I repeated the same process with the child, sailboat, and lighthouse. After adding the objects i realiozed that they were very obviously lighter than the general color scheme of the pictuer so i took a ligh grey paitbrush to them all with a lover opacity to darken them to fit the picture better.

Rosco the Hula Dancer


I added a picture of rosco the the top picture. his arm was orriginally across his chest so I had to cut it out and rotate it. I created a New layer that i put rosco on so if I made a mistake the background wouldn't suffer.

In this photo I started with the picture on the left and then transformed it to the picture on the right. The first thing that I did was eliminated most of his freckles. The way I did this was by selecting from the toolbox the healing tool and then found a spot on the original picture that did not have any freckles, then I pushed in the ctrl key and clicked. To begin eliminating freckles what I did was clicked on anywhere there were any freckles and then they would disappear. After getting rid of all his freckles I next whitened his teeth. To whiten teeth what you have to do is select the paint brush and change it to white. Next change the opacity level to the lowest it can be then change the size of the paintbrush to fit the tooth size.

Me in the desert


For this I used the hand drawn select tool to take me out of a scene of me sledding during the winter, I just copied and pasted it and put me in a desert.

Broken Screen


I made this by using a screen shot and a picture of broken glass. On the broken glass layer i used the "select by color" to delete all the blue of the unbroken pieces of glass.

no freckles/ color change


original

The original image had freckles and green eyes as shown above. I removed her freckles just to play around with the tool by using the bandaid button. I just chose a portion of her skin that did not have freckles by holding down the control button and then clicking on the freckles to remove them. I had to change the selected section of freckless skin however, because her skin tones changed throughout the image and there are shadows. I also changed the color of her eyes by selecting the ellipse tool and fitting the ellipse to the shape of her eye. After that all you have to do is right click and scroll down to colors and then go over to colorize to select the lightness, hue and color that you want to change to.


I just used the scissor tool to cut out yoshi and pasted him on the background with the master chief. It automatically put it in my tools so I went to the paint brush and pasted him in the picture.

Tuesday, February 10, 2009

Master Chief Owns Kenny


This is a picture that i added in the people from the south park show into a screenshot from the videogame Halo. I cut each individual south park character out and put them in specific locations. The character of kyle is put in the tube to the left of the picture. He is not fully on the screen so that it looks more realistic and so that i looks like he is auctually in the pipe. The character of Stan is standing on the box in the background. All i did to achieve this is place his character after cutting him out of another picture on the box. The characters of Kenny (the dead one) and Cartman (the one with the gun) were both strategically covering up aliens that were in the original picture. In the final product it looks as if Cartman and the chief are fighting while Kyle and Stan look on in horror as their friend Kenny got shot and is being eaten by rats (which is typical of his character in the TV show for anyone that isnt familiar with the show). If you want to see the picture in a much higher quality look at it in my facebook account.

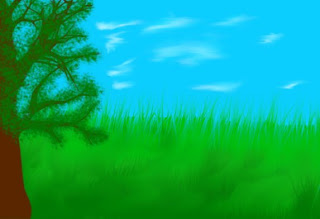
Tree


To do this I created layers of green and used a large smudge brush to create different patches of green. Then I used a very small smudge brush set at 90% smudge rate to create the grass. To make the tree I downloaded (with Marty's help) a tree brush. Then I used a small galaxy brush to make the leaves.

Monday, February 9, 2009

Snow Driveway


This image is suppose to look like you are looking up a snow covered driveway. The first thing I did when making this painting was designing the driveway. To do this I made two lines, each coming from the corners and going diagonal to the center to make it look like it is getting smaller. After doing this I colored the end of the driveway and kept shading and smudging darker colors of gray until I reached the end of the driveway. The next thing I did was using one of the different options of the brush tool in order to make the tire tracks. I did this by gradualling made the brush smaller as the driveway got longer. Making the snow banks was the next project I came across. In order to make them I used the spray paint brush along the sides of the driveway. After doing this I used the filter tool and somehow made the driveway to curve. My last project were the trees; they took forever. After I made the first one I figured out how to copy them. When doing this I had a ton of trouble with the layers. After this I decided to just make separate trees, and this didn't work out either because, one it was the next day, and two I couldn't match the right color. Finally, on the last day of working on this painting I used a different computer and everything worked out. The used the smug tool the most in this painting and it took me about 5 class periods.

This is my earlier image but I added a background.

A guitar


This is a guitar... I played around with making straight lines using the shift key and also making curved lines. I also used bright colors for the background but I used blah colors on the guitar. I also tried a little bit of shading around the top of the guitar to make depth. I used the sparks tool to add snazzy color to the back ground. That is still my favorite tool. I don't know anything about guitars so I just tried to draw this from a picture.

...Seven Days...


Ahem. I have to admit, I've never seen the movie 'The Ring' or whatever it's called. I did my own personal take on it. I mainly used the square brush technique, mainly to make it look like a TV. I used the spark brush to make an explosive feel... And then used the blur tool to make it look strangely awesome. The red says seven days. There is a ring. It's yellow. Yeah. (Mock at my epic fail. Maybe I really should see the movie before jumping to conclusions, uh?) This is basically abstract.

I didn't have enough time to finish this. New things that i learned was that you can zoom in to make individual things more crisp looking and that you can make a strait line by using the shit button. To make the back ground i made a lot of layers and used different shades of color to make the sunset. I also used the smudge tool and the air brush to make the clouds and the lights.

Full Moon


This is a picture of mountains with a full moon rising behind them. I mainly used the paintbrush and smudge tool. To get greater detail i layered many different colors and shades in the sky, mountains, lake, and trees.